How to Build an Actual Play Podcast, Part 3
Post-Production, or: Elevating Performance Through Editing
As you read this newsletter I encourage you to picture me rubbing my hands together maniacally because this is the article I’ve been most excited to write. This is the area where I feel most–and, inexplicably, sometimes the least–confident: Post-Production.
In this newsletter I’m going to try to give you a primer on post-production and provide you with as many high-quality resources as possible to get you editing quickly and with confidence.
For the purposes of this article, post-production encompasses everything that happens after you turn off your microphones and until you export your final mp3 file. So we’re gonna be talking about editing, sound design, DAWs, LUFs, and a few more kind of boring things that will make a HUGE difference in the final quality of your podcast.
This article won’t be a comprehensive one-stop-shop. But I hope to provide you with enough information to get started and a road map to learn more with signposts pointing towards all the resources that I’ve found most valuable.
The Goal of the Edit
The goal of the edit is to elevate the performance of the players. Full stop.
That’s the brass ring, folks.
Everything you will do in your DAW–or Digital Audio Workstation–is in service of the players. You cut out distractions, enhance epic moments, clear up confusion, and make it easy for audiences to listen.
Any time you are editing remember that this is your overall goal.
The Reality of Editing
Ok, veggies first (and not the really tasty roasted ones). Editing is a lot of work. Even at its most basic it will likely take a few hours even when you know exactly what you are doing. It is often a tedious and thankless job.
Now the good news: audio editing is cheap and easy to learn. There are free and cheap DAWs that are excellent (and are used by professionals every single day), there’s a glut of good tutorials and information on YouTube to help you get started, and the basics are really really simple. The trick is just doing them over and over and over.
Getting your Files in Order
If you read my last article you already know that a lot of post-production work is eliminated if you take the time to record your audio properly. So hopefully you heeded my words and you’ve got some solid audio quality on each and every track. Whenever possible, get your players and guests to send you .wav files. WAV files are uncompressed audio files and, as such, are significantly larger that mp3’s. However, they are much higher quality.
At the end of all your post-production work you’re going to be mixing everything down to an mp3 which will introduce some unavoidable information loss (a worthwhile exchange to get your file size down from 1-2 GB to 30-40 MB). So by starting with .wav files, you are will only have once instance of information loss at the very end of your post-production chain. This isn’t essential, but it’s always good practice. And if you’ve learned anything about me from this series it should be that I LOVE best practices.
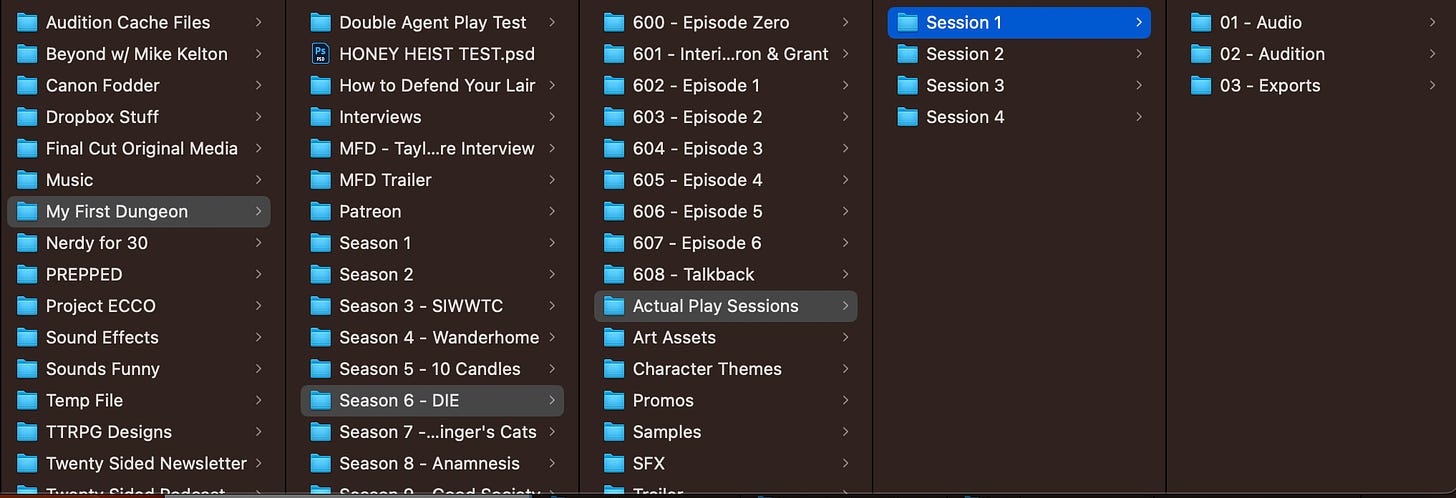
So organize, organize, organize. Future You will thank Present You, I promise. Label your files clearly and consistently. Create folders for raw audio, DAW files, exports, music, etc. Do it in whatever way makes sense to your brain. Just be conscientious and consistent. If you want to make a long running series, getting into this habit now will save you hours in the long run. (Plus, well-organized files just look pretty)
Get it N’Sync
If you recorded remotely that means each speaker will be on a separate track with just their voice (and hopefully minimal background noises). This means you have great isolation which is incredibly helpful when one player sneezes in the middle of another player’s epic monologue. You can just cut out the offending sternutation and no one’s the wiser. But that also means it is slightly harder to sync up the audio, but FEAR NOT. It’s still quite easy.
If you were playing through Zoom and did as I suggested in part 2 and recorded the Zoom call as a backup, then you’ve already got a reference track! Just pull the fully mixed Zoom mp3 onto a new track and line up each speaker’s audio file with the Zoom file. It’s pretty easy to do by hand, but many DAWs also have a Synchronize button that will do it for you. Each DAW is a little different so explore yours for those helpful little time-savers.
If you recorded on multiple microphones in the same room then you are going to be contending with microphone bleed. Mic Bleed is when one microphone picks up the audio from a nearby source. So when I’m recording in the same room with Elliot, you will still hear Elliot talking on my microphone even though he’s on the other side of the room. Removing mic bleed is a labor-intensive process, so recording remotely might be a good idea if you’re looking to reduce editing time. Though mic bleed sounds bad, it is super helpful when syncing your audio. Just match the two files together.
Noise Removal
Every recording, no matter how good the microphone or how quiet the room, will have some amount of noise–ambient frequencies that are present and consistent throughout the recording. Really listen the next time you’re in a quiet room, you’ll hear a whole world of noise.
Again, this is relatively easy to remove and can make a world of difference in a recording. Most DAWs have some form of de-noise or noise cancellation processing. Here are some tutorials on using some of the most popular DAWs noise cancellation, but the process is always the same: sample a bit of the audio that’s just noise, feed that into the DAW to analyze, then click GO and watch your waveform get instantly better.
A word of warning: noise processing is NOT a magic bullet. It should be used lightly or you risk distorting your audio (this is true for any kind of audio processing). Remember that each step we take to improve and control the audio will build upon one another to create a great sounding podcast. No single step is a replacement for any other.
Compression

There is no magic bullet in audio editing, but if there is one it would probably be compression.
Compression is a process that reduces the loud signals and increases the quiet ones in a piece of audio. This gives you a more consistent sound throughout an individual track.
Check out this animated guide to audio compression. It’s super helpful and just cool as hell.
But the real magic of compression is when you apply it to your podcast as a whole by adding it to your bus tracks or directly to your mix track. The compressor acts as a “glue” which sticks to all the tracks and makes them sound like they belong together.
There are more types of compressors than grains of sand on a beach. Start with whatever is native in your DAW. Podcast vocals usually want a 3:1 ratio of compression. This means that only 1/3 of the signal above a certain threshold will be preserved–said another way, the signal above the threshold will be reduced by 2/3.
PRO TIP: Rather than applying one, significant instance of compression, consider using multiple, less aggressive instances of compression at various points in your signal chain. The whole will be greater than the sum of its parts and you will minimize the chances of distorting your audio.
If you’re looking to spend some money on a nice compressor, I recommend the CL-2A by Waves. It’s $35.99 and is a really great compressor for both podcasts and music.
Music
There is a reason that you think of John Williams’ iconic theme for Jaws anytime someone mentions a shark: music is inextricably tied to emotion. It’s simply the best tool you have. Pulling in a music cue at the right point in a player’s epic speech can tug on the heartstrings and put that exclamation point on the emotion of the scene. As I’ve said over and over, the goal of the edit is to enhance your players’ performance. Music is the strongest way to do that.
A few small notes about the ways I use music that might be worth considering:
I don’t usually like music fading in or out so it creeps up into a scene. I like hearing the starting and ending notes of a piece of music. Usually, I find those are the most powerful moments of a song to use. When a track just fades in or out, it often feels unintentional and doesn’t have much punch. But when you hear the sting of the first few notes of a song right as the villain delivers their sinister ultimatum, you feel that punctuation.
Don’t be afraid to use the same tracks multiple times. It’s nice to have an aural anchor that connects the listener to a particular character or location, so consider using the same track (or type of track) for some major characters or places.
And as an antithesis to this whole section: Don’t be afraid to use silence. Remember that a “rest” is a part of music. The moments where there is nothing are just as important as–and sometimes more important that–the moments filled with swelling melody.
For the majority of my music and sound effects I use a service called Artlist.io** that costs me $299/yr and provides me with a glut of royalty-free music and sound effects that I can use as-is or alter and layer to create whatever new and interesting sound the story calls for.
Finding free music online is definitely possible, it will just require a bit more work. Here is a great list of free music libraries you might find helpful.
**Not a paid ad, but I have included a referral link.
Sound Design
If you’re into shows like My First Dungeon, Worlds Beyond Number, or Mission to Zyxx then I’m guessing you really love sound design. Just like everything else we’ve discussed so far, sound design is a few small things done over and over and over again.
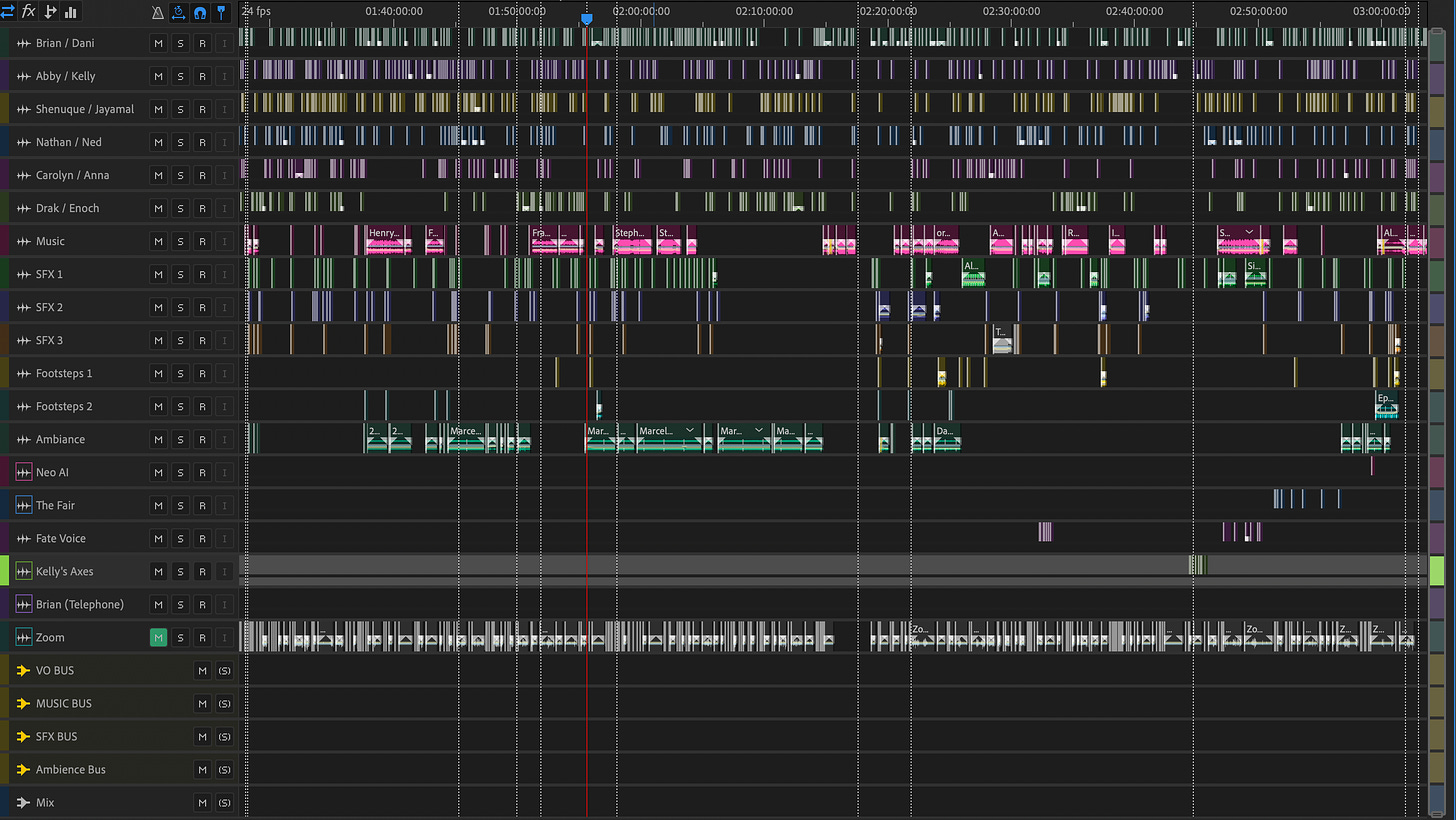
Ambiance is the background noise of the scene. It can be anything from the sound of a park, the sound of a murmuring crowd called “walla”, or the quiet room tone of an empty apartment. Ambiance establishes setting. One tip here: when you introduce a new ambiance, start it a few dB higher than you should and slowly bring it down to a comfortable level. This helps clue in the audience to where they are in the scene and then allows it to fade into the background.
Sound Effects or foley are the most classical examples of sound design: footsteps, glass breaking, punch hits, etc. If you aren’t making your own foley, you’ll spend a lot of your time searching sound databases for the right piece of audio. Usually, you’ll only find something close. In those cases, layer 2 or 3 different sounds to create the sound you want. I generally try to find the beginning, middle, and end of a sound. If a slap doesn’t have enough power to it, I might add a whoosh to the front to signify the hand flying through the air and then the end of an impactful punch at the end to deepen the hit.
Most of my sounds are made through trial and error. But as you get better, your batting average will continue to go up until you almost always know exactly how to get the sound you’re looking for.
Panning is when sounds move from left to right using stereo sound. When used correctly, this gives the illusion of characters existing in 3-D space. They are able to approach from far away, walk from left to right, or be sitting on opposite sides of the table. Panning is a great way to increase immersion in the podcast and can also be used to help clarify the world. By positioning voices on one side or another, you can subtly indicate who is on the same side of a conflict and who is at odds.
Two notes on panning. First, don’t overdo it. I rarely go beyond 20%-30% of a pan except for extreme effect–usually for comedic purposes. Doing it too much can be taxing on the ears and, ultimately, a distraction. Second, panning adds another significant step to your workflow. If you are looking to shorten the amount of time you spend editing your show, panning should be the first thing you cut.
Mixing
Some people talk loudly and some people talk quietly. Dramatic moments are loud and intimate moments are quiet. Mixing is the process by which we raise and lower the decibels of each audio file so that they are consistent so the listener doesn’t have to constantly be adjusting their volume like a Christopher Nolan movie. So if you’ve ever complained about the music being too loud then you’ve been complaining about the mix.
PRO TIP: Audio files will sound slightly different depending on how you’re listening to them. If you’re editing with headphones, it might be worthwhile to listen to a bit of the episode on regular speakers or in your car to make sure everything still sounds good on a different system.
Mixing is a tedious, but important process. Luckily, there are some GREAT plugins that make it WAY easier and save you hours of work.
If you are looking for the ONE plugin I would recommend you start out with it would certainly be the Waves Vocal Rider. This one plug in does a ton of the heavy lifting when it comes to vocal mixing and has saved me hours on each edit. Plus, it’s only $40.
Mastering
Mastering is the tip of the sword. It’s the last 5% that makes audio go from good to great.
Equalization (or EQ) is the process of increasing and decreasing specific frequencies in an audio file to achieve a better sound. This is often done to make a voice sound better or to remove distracting or harsh frequencies. There are lots of great tutorials online by people who are significantly more qualified than me to talk about this particular subject, so I’ll link them here.
Clean Cut Audio - I think this is the best overall resource on YouTube
Mike Russell - Easy to digest videos using a variety of DAWs
Loudness is most commonly measured in LUFS–which stands for Loudness Units Full Scale. I did not know that acronym until I looked it up for this article, so you probably won’t need that piece of trivia either.
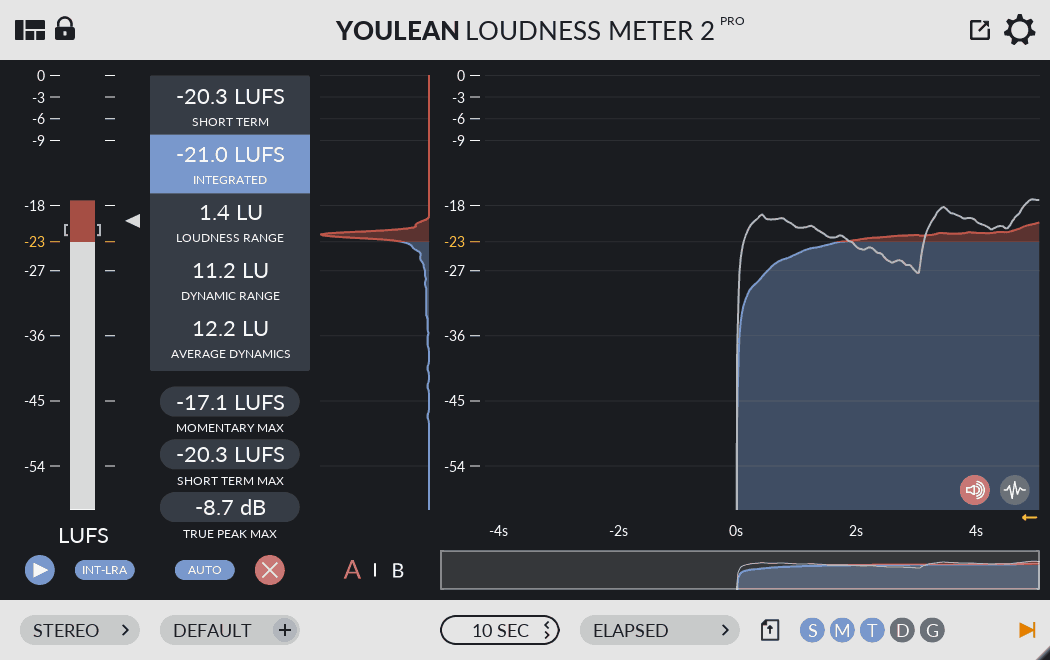
Here’s what you need to know. Podcasts should be exported at -16 LUFS. That is the standard for Spotify and other podcasting platforms. If you are posting to YouTube, the standard is -14 LUFS. You can learn more about LUFs here, but really those are the only two numbers you need to know out of the gate.
If you want to monitor the loudness of your podcast as you edit you can use a loudness meter. Most DAWs have a built-in loudness meter that will do the trick, but if you want to upgrade I recommend the YouLean Loudness Meter which has a free version (which I use) and also a pro version for ~$35.
Once you’ve done all you editing, mixed and mastered the tracks, and brought the loudness to -16 LUFS all that is left to do is to “mixdown” your project into a single .wav file and then export it as an mp3.
Congratulations! It’s a podcast!
Alrighty!
I think that is enough to get you started on your post-production journey. This is certainly not a comprehensive list of things to know and consider, but I believe it’s enough to get you started with confidence. Your first time editing a podcast can be intimidating, but just take it one step at a time and you’ll be absolutely fine. There is no substitute for doing, so pull your audio into your DAW and just start editing.
I want to end this article how I started: with a reminder.
The goal of the edit is to elevate the performance of the players. Full stop.
Trust your ears. Elevate your players. Learn by doing. And put your show out into the world.
Best of luck :)
Brian
Upcoming Schedule:
My First Dungeon Presents: DIE
5/26 - Cast Reunion ft. Kieron Gillen
5/30 - Full DIE OST Release
6/2 - New Season Announcement!!
6/16 - New Season Premiere
All seven tracks from the DIE OST by BE/HOLD are available now! Follow BE/HOLD on Spotify to stay on top of new releases from this awesome musician.


